Consulting, Microsoft Dynamics AX
Beginning Management Reporter Tutorials Part 4 management reporter doing what it does best with financial data
 13084
13084 
May
In Exercise 4, we finally see our completed report. Hold on to your horses baby.. We get to see our powerful management reporter in action with a full-blown powerful report (based on a real-world example that I developed for a company). People always ask me why I consider Management Reporter so important. Easy, there is no reporting tool like it when it comes to financial data. I write this in hopes that you will actually come to love and appreciate the tool as much as I have.
This series of posts can be found here:
http://instructorbrandon.com/beginning-management-reporter-tutorial-series/
Scenario: Your users come back to you with a number of requests. First, they would like the ability to click down on data and actually see the transactions that went into making those totals. Second, they want the report to be saved with the following title, “YourName Class”. Third, they want a header with the name of the company on the first line, the name of the report on the second line, and the month that the report ends on the third line “For Month Ending at the current end date”. Fourth, they don’t want the top line to have money as it does now. Fifth, they want negative numbers in red. Finally, they want to reduce the spaces between rows or columns as much as possible.
Wow, sounds like a lot, but watch how easy Management Reporter makes it.
-
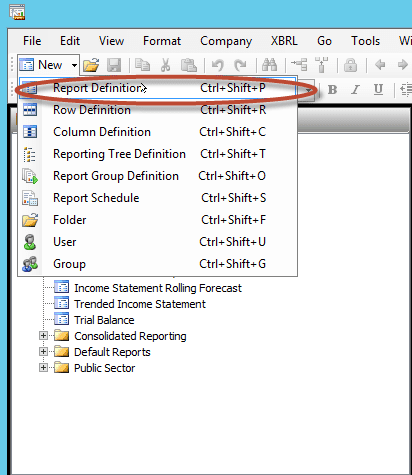
Create a new Report Definition by clicking the New button and choosing the Report Definition Option
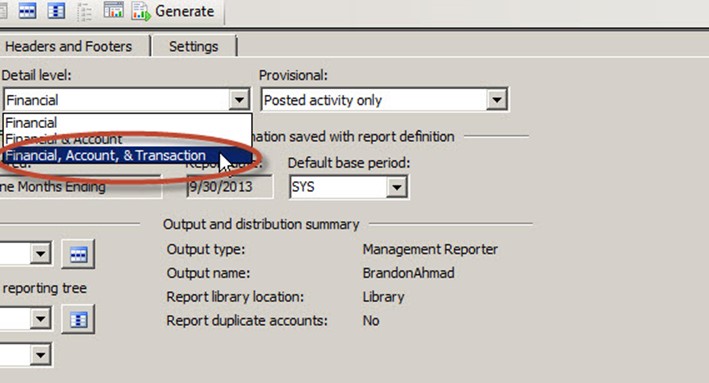
- To add Drill-down capabilities to the report, click on Detail level and change the drilldown to Financial, Account, and Transaction.
-
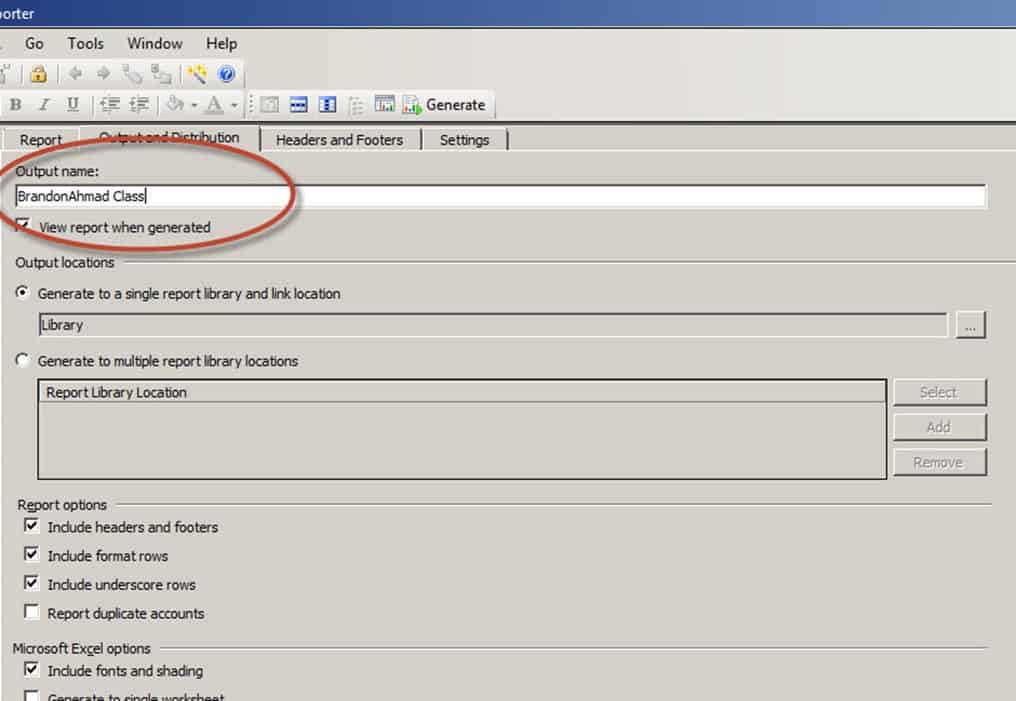
To change the name that a report is saved as for users to see, go to the Output and Distribution tab. Go the Output name column and change it to YourName(placeholder) Class. Notice how I have put my name in here.
-
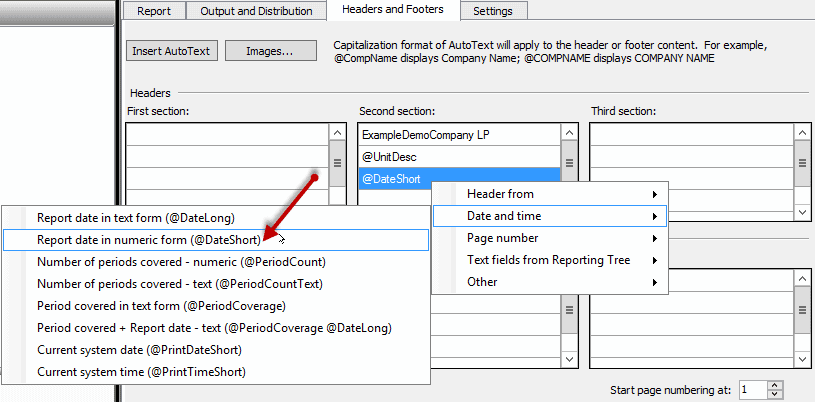
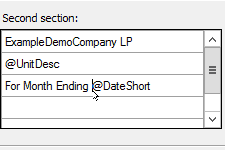
The following will take two steps. Now, let’s go to the Headers and Footers section so that we can add a professional formatting touch to our report. With your mouse, place it in the top of the center section and delete whatever is in the first row. Instead, type, in ExampleDemoCompany LP in just regular text. Then, place your mouse in the third section and delete whatever is in there (you can use your keyboard to delete). Right-Click on the third line of the Center section, hover your mouse over the Date and time, and choose Report date in numeric form (@DateShort).
-
This is the second step of requirement number three. Place your mouse inside of the third line of the Center Section. Click inside of it and type For Month Ending. When you are all finished, you should see a Headers and Footers Center Section. That looks like the following screenshot.
-
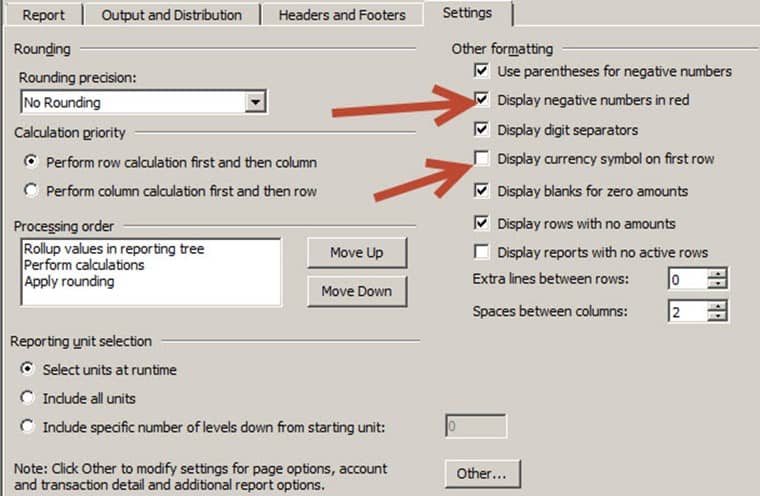
In this step, we’ll easily satisfy requirements four and five. We’ll take the currency symbol out of the top row and display rows with negative numbers in red. Go to the Settings tab. Go to Other formatting. Check the Display negative numbers in red option and uncheck the Display currency symbol on first row option.
-
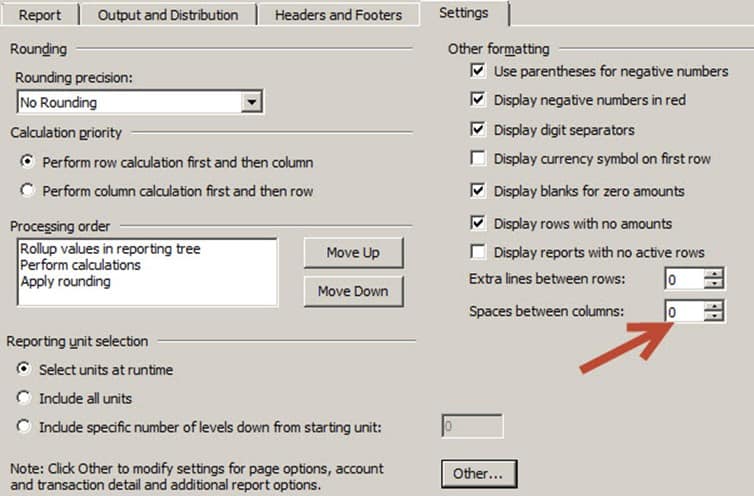
In our last requirement, we want to minimize spaces between rows and columns as much as possible. This is easily done by making sure that the Extra lines between rows is set to 0 and the Spaces between columns is set to 0.
-
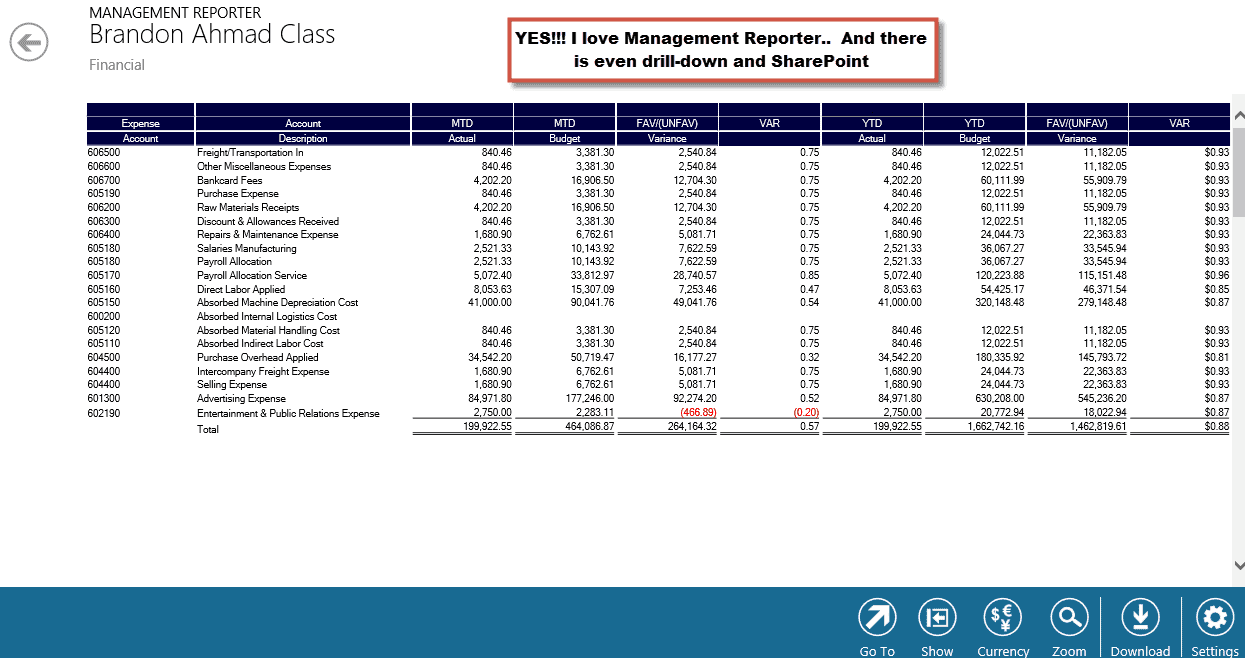
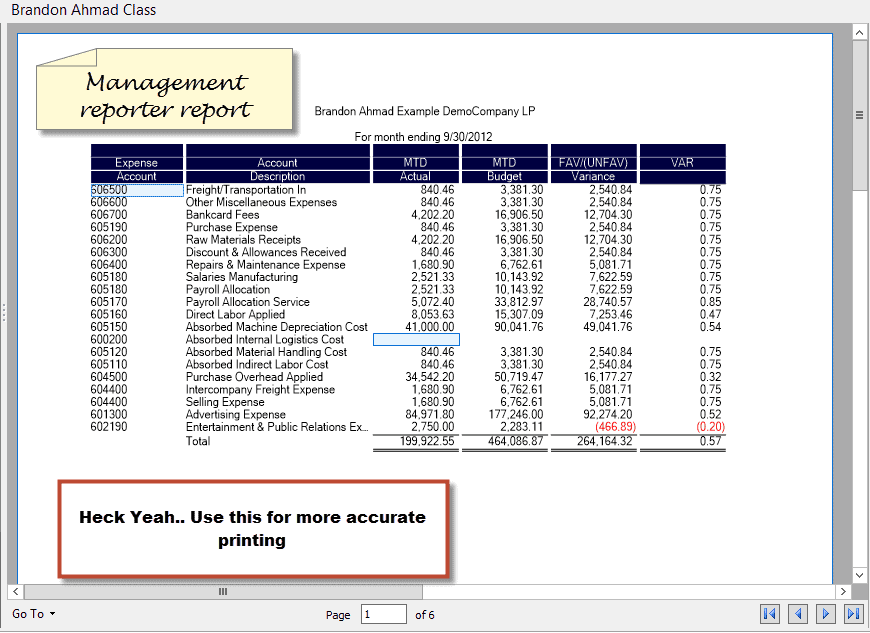
Now, save your report and run it by clicking Generate. Congratulations, you have now made a full management reporter report. Here is how mine looks.
And now, let’s look at our work through two viewers.
First, here is the web viewer which renders through Internet Explorer or the Web Viewer that puts these awesome reports in SharePoint
Second, here is the report viewer. This is usually better for printing. You can change the view to landscape if you like. This is portrait so it isn’t showing all the columns.
Also, if you double click on any of those values, watch it drill-down and show you the transactions that made up the data.. Management Reporter does way more than this. Keep in mind that this series just scratched the surface by giving you the fundamentals along with a few of my tricks. You can do so much with this tool, and I hope that you have enjoyed the series. One more tutorial after this and we are done with the first Management Reporter series..
