Consulting, Development
Dynamics AX AIF Tutorial Series Part 3: AIF, Document Services, and a SharePoint InfoPath Forms step by step for Power Users Part B
 15016
15016 
Jun
In this tutorial, you get to really have some fun with Dynamics AX AIF. And don’t forget the term SharePoint. That is where you will see the true power of using Dynamics AX with other systems. We’ll go through the wizard and tidy up our service so that it is ready for deployment. You’ll come away understanding which components are necessary to make your service run with plenty of tips and tricks along the way. By the end of this, you will have code that is ready to be hosted and will understand areas where you can make changes to the wizard. Hang on, I’ve promised to show everyone the real value of doing this when we start making our service utilize SharePoint’s incredible functionality. Note: please forgive me for taking so long to get back to the tutorials and videos that I enjoy working on so much. 80 hour work weeks seem to be the norm now days in my world. But I promise to keep pushing out tutorials whenever I can get some time.
This tutorial assumes that you are using the free Dynamics AX 2012R2 image available for download on partnersource.
-
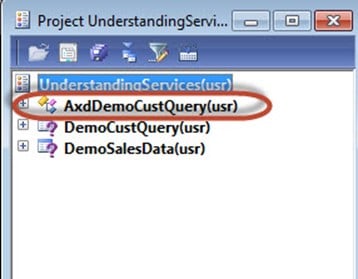
Start by making sure that your AxdDemoCustQuery class is in your UnderstandingServices project. Your Axd classes are the ones that are responsible for actually generating the XML that gets transmitted over a network. Remember XML is a universal format of data that allows for communication between clients no matter what type of system they are built with. By now, we’ve covered how to drag a class into a project in other tutorials (including the first part of this series).
-
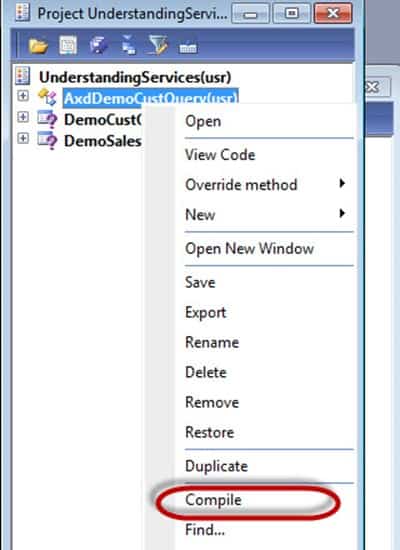
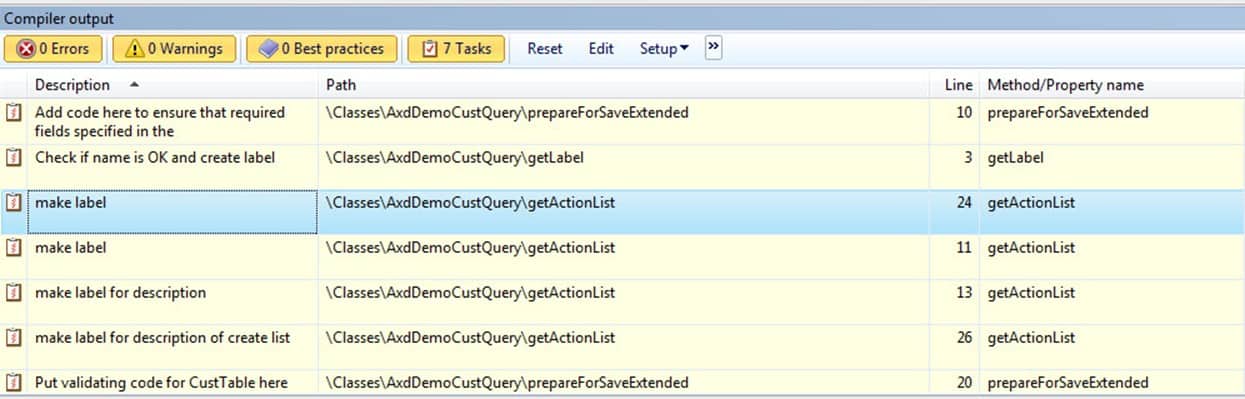
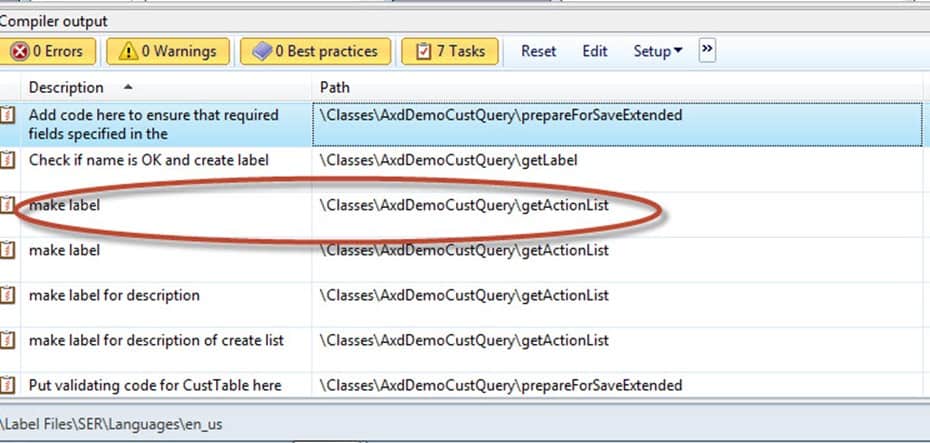
Now, right click on AxdDemoCustQuery(usr) in the UnderstandingServices window and hit Compile. That will force the task window to come up. The task window contains recommendations on what we need to do in order to have our service ready. Think of this as a friendly way that the wizard helps you.
-
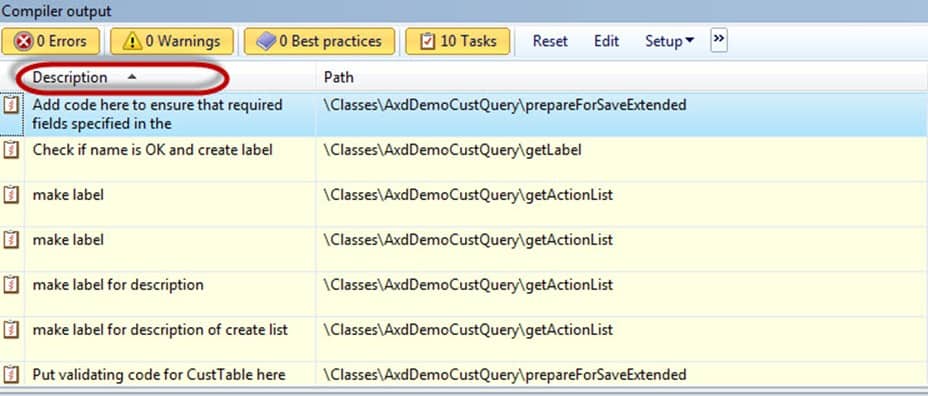
Click on the Description column of the task list to sort all of the tasks so that we can tackle them in groups – just better organization.
-
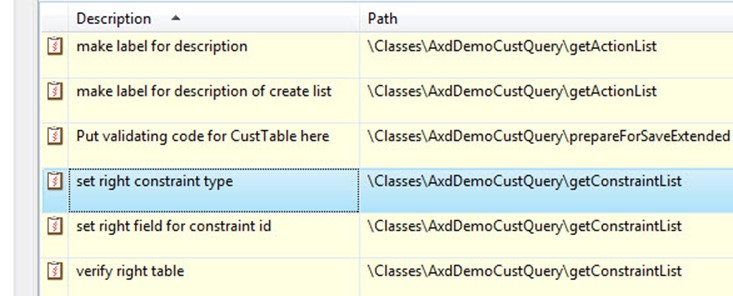
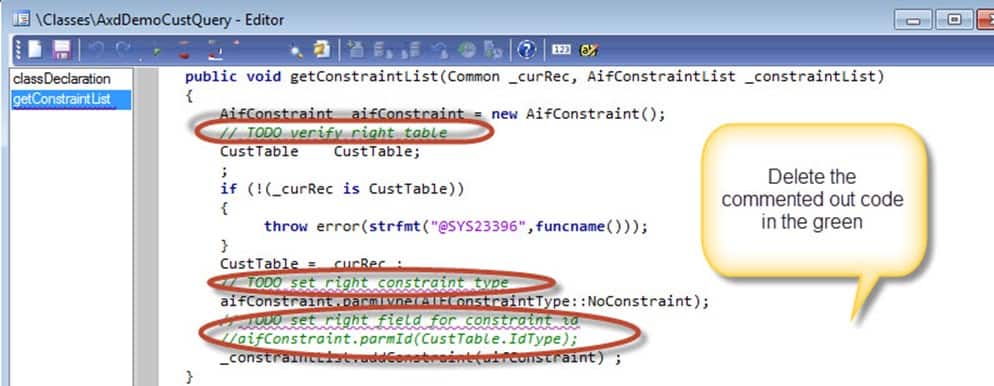
Now, for our first order of business. We need to delete everything that has a constraint type in Dynamics AX 2012. Constraint types are a deprecated feature and we can’t use them anymore. This is just left-over code as an artifact from the past in the 2012 versions of Dynamics AX and beyond. Double-click the row in the Description column with the value of set right constraint type to bring up the code for deleting.
-
In the ClassesAxdDemoQueryCustQuery – Editor window, you should be auto-highlighted on the getConstraintList. Now, you don’t have to understand code to do this. Find any code that is in green, which means that it is commented out and delete it. The two pictures show a before the code is deleted and an after the code is deleted state. Hit the little save icon when finished (see the after picture with the circle by the disk). That will eliminate the constraints. You will need to always do this on the Dynamics AX 2012 products.
-
Next up. In what will become abundantly clear, we need to have a way of describing our service operations to the outside world. For example, if we allow for them to retrieve customer information, we may choose to label an operation that gets customers information as “GetCustomer.” That makes it easier for people to understand what they are doing when they invoke the service (or write code to invoke the service). In Dynamics AX, we do this through labels.
Double-click on the row with the make label description shown in the picture below. This will bring up the getActionList method.
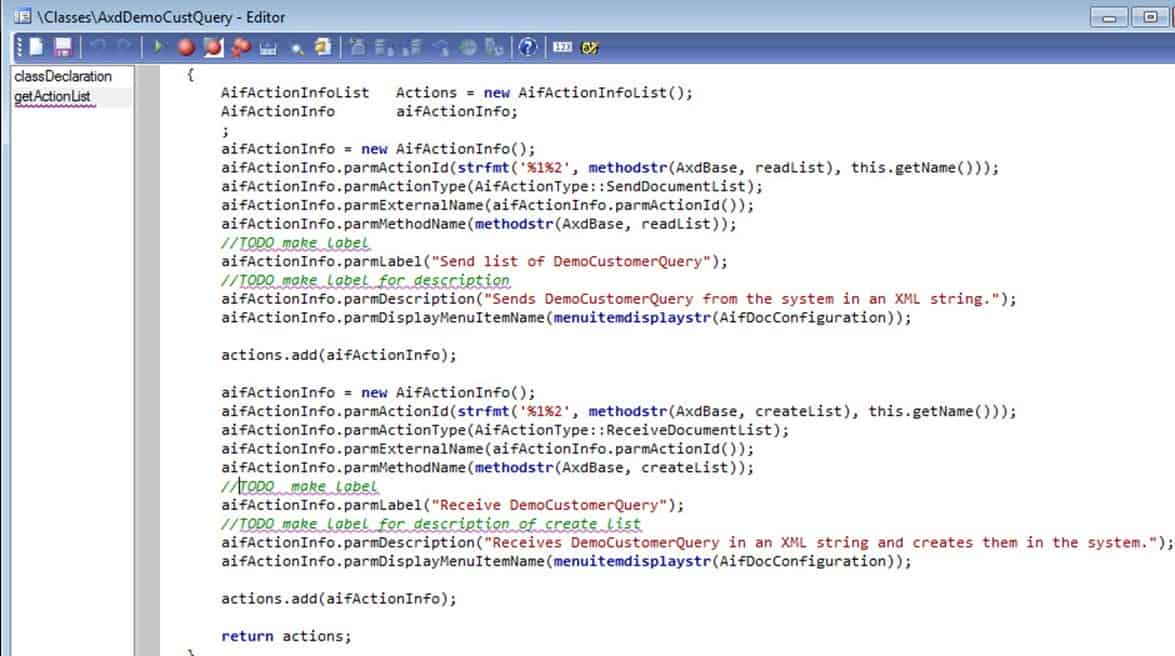
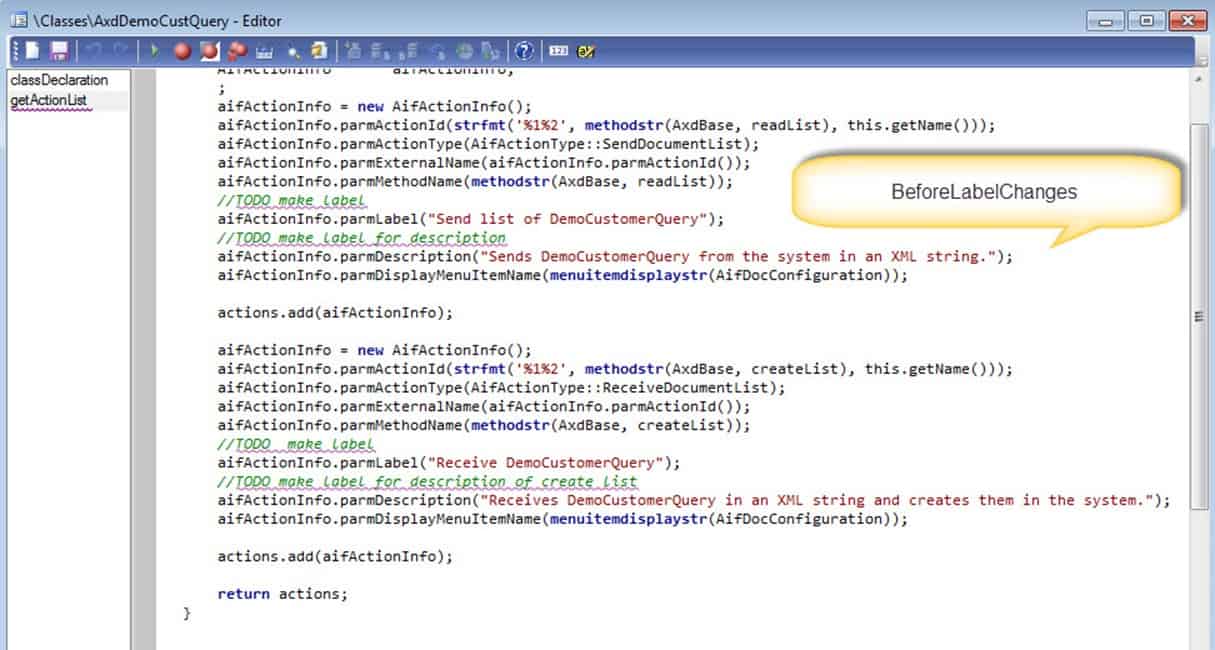
- Notice that we have labels to support two operations with suggested descriptions to get us started. For this step, just go through the table below to see what you are doing. It’s not so much that you can get anything wrong here as much as you want to use friendly names that really describe what your services are doing. Here is what the comments mean:
| Comment | What it means | What you should do |
| //ToDo make a label (“Send list of DocumentCustomerQuery”) |
This means that you need to give a descriptive name to the overall process of retrieving a group of rows through your DocumentCustomerQuery | Figure out what the query is retrieving in those rows. Afterwards, put a meaningful label on it. For data retrieval, most people use the term “Get”followed by what is being retrieved. So, I would use “GetCustomers” as my label. |
| //ToDo make label for description (“Sends DemoCustomerQuery from the system in an XML string”) |
Sometimes a name doesn’t tell everything that your service is doing when someone invokes the read operation. Put a description on it to make things more clear. | As a description, I would put “gets a list of customers from the Dynamics ax database”. Remember, there is no one right answer. You make come up with your own description. |
| //ToDo make a label (“Receive DemoCustomerQuery”) |
This method allows clients to create new rows of data. In this case, creating new customers. | Usually, people create an operation with the term “Create” followed by what is being created. So, I would use something like “CreateCustomer” to label this operation. |
| //ToDo make a label (“Receives DemoCustomerQuery in an XML string and creates them in the system.”) |
This method describes what clients are actually inserting into the database when they invoke the method. | So, for this description, I would use: “Creates new customers in the Dynamics AX database”. |
-
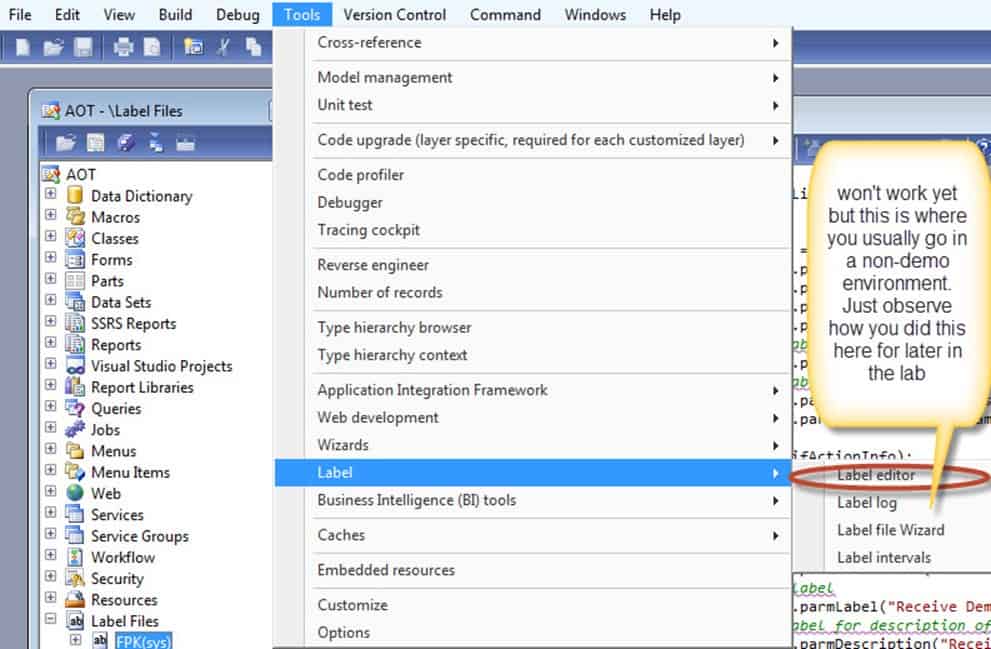
So, we have a total of 4 labels to be created for the getActionList method. Let’s do that now. Click Tools à Label à Label editor.
-
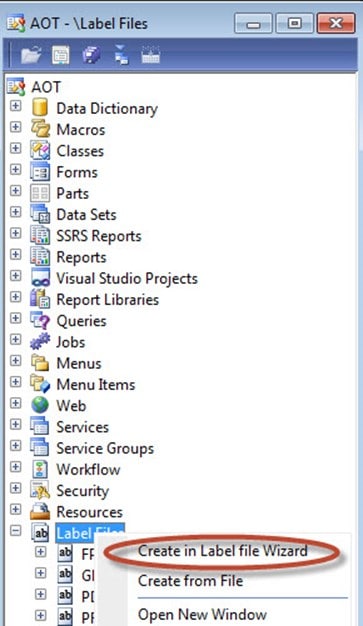
Now, for our Dynamics AX 2012R2 file, we need to do something known as creating a Label File. There are built in label files, but we don’t want to mess with those as that can interfere with data upgrades and migrations later. Instead, what we will do is create a new Label File. A Label file is a file that we stores labels on it. There are advantages to deployment and upgrading that I won’t talk about here. But suffice it to say, that these are helpful. You probably already have label files that have been created on your existing installation, so remember to check with whoever created them first. In the AOT, browse to Label Files. Right-click on Label Files and choose Create in Label file Wizard.
-
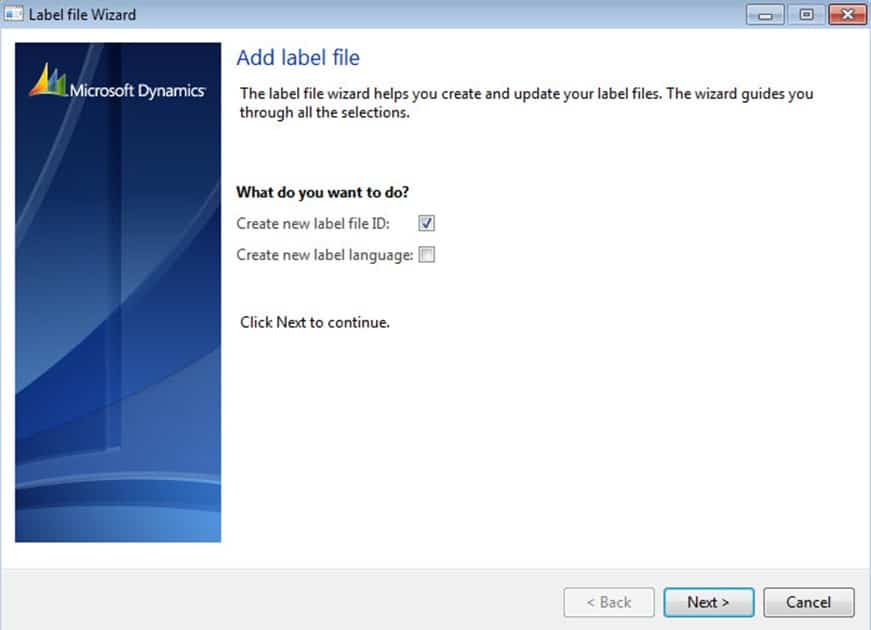
Leave the defaults checked and click Next as we won’t be creating a new Label Language, since we are using the built-in language of English.
-
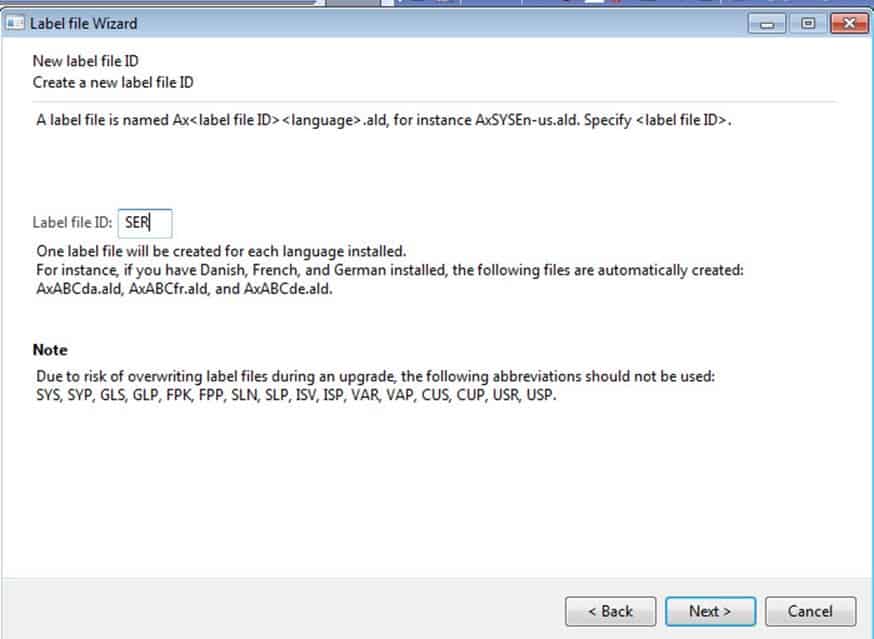
Ideally, the ID, should be some term that identifies what the label file will handle in 3 letters. You shouldn’t need many of these. In this example, type SER for the Label file ID. Then, click Next. You could almost pick any 3 letter terms that you like. The key here is to try and use something meaningful – I used SER for services in my mind. Pay attention to the few 3 letter terms that are not allowed. There is a good reason for that – using those terms can mess up your core system files.
-
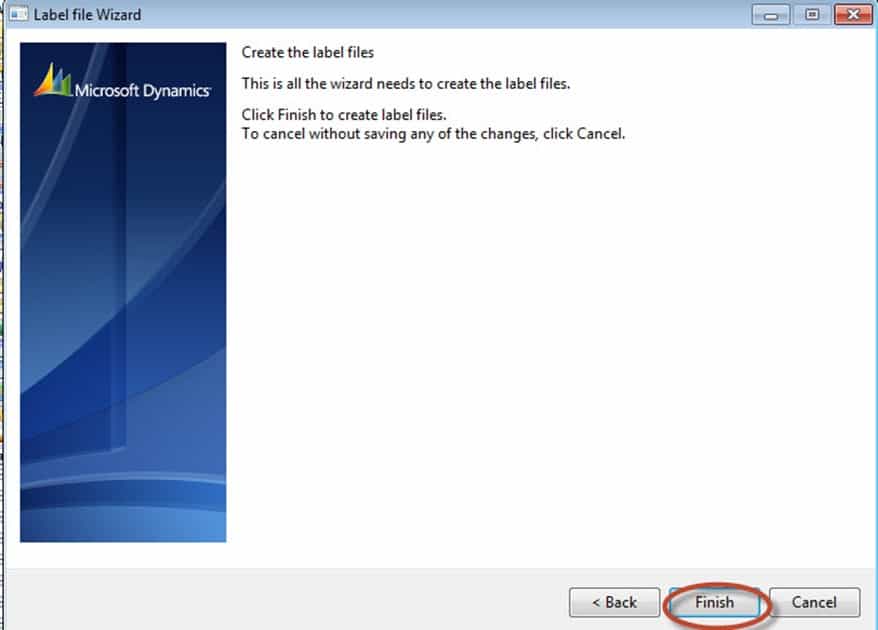
When you are all done, click Finish. Thankfully, we only needed to create the label file one time. Now, we can begin to actually add some labels to it! What Dynamics AX 2012 will do is try to create a label file with that ID for each individual language installed. You’ll notice that you will get a “Critical Stop Error” because Dynamics AX cannot create a label file for certain languages not installed on the system. That is okay, just ignore the error message by closing it.
-
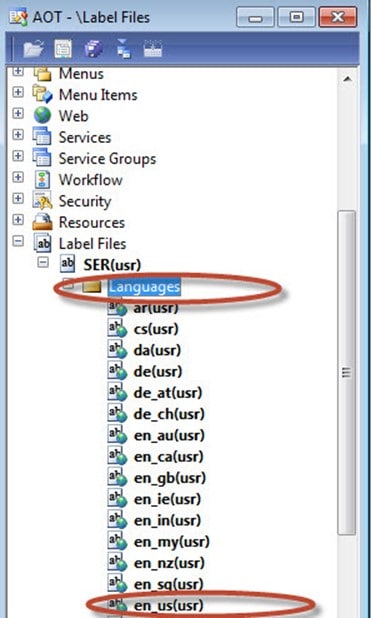
To verify that everything worked, you should be able to expand your label file and notice the en_us(usr) as one of the nodes. That will allow us to create our labels in United States English. Clearly, you can easily change the label file to another language depending on your requirements. This mechanism is also beneficial because it allows us to create multiple label files for multiple locals. So, for example, if your service needed to be consumed in Spanish and English, that would be easy to do. Now, let’s add some labels.
-
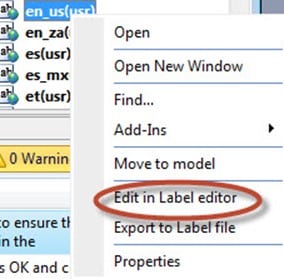
Right-click on en(usr) and choose Edit in Label editor.
-
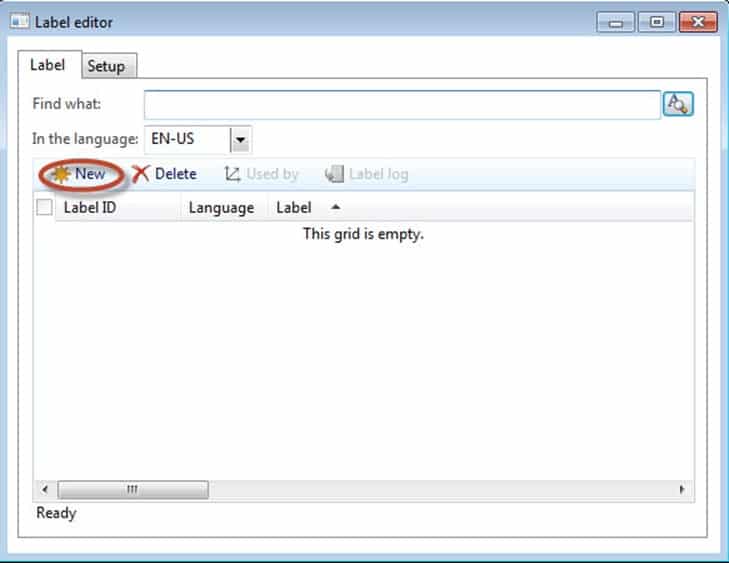
On the Label Editor window, press the New button.
-
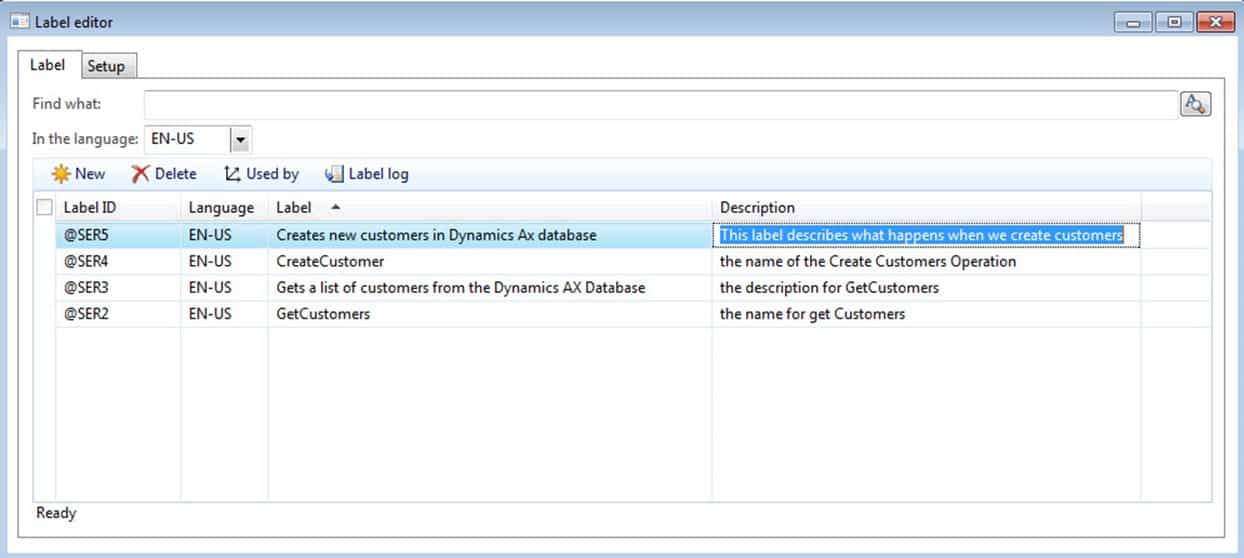
Enter “GetCustomers” without the quotations as the labelname. Type in “the name of get Customers” in the description filed. Note, the description column here is different than the Description text that appears in the Label column. We are using the description text in our label column as the text that our users will see when they connect to the service. The difference is that users can’t see this description unless they are logged into the development environment like you are. The Description that we will make next is for users to see. I’ve expanded the label editor window by dragging its edges in the corresponding screenshot. (see next step for screenshot)
-
After you are finished with that task, keep on clicking new and entering values until you get 4 labels the attached screenshot. When all done, hit [CTRL]+ [S] to save the labels. When everything is finished, you should see LabelID’s for each label. We’ll need those. Note, your labelID’s may be different depending on the sequence that you took. That’s fine. Just make sure that you enter the right label ID’s into the one place that we need to enter them. Also, make sure that you take note of your labelID’s for the next task by writing them down or putting them somewhere.
-
Now, we need to get that AxdDemoCustQuery class opened again if you have already closed it. Double-click on the make label task again as you did earlier in this lab. If you don’t still have your AxdDemoCustQuery class open, this is one of a million way to bring it up. What matters is that you get the method up so we can edit the code.
-
(optional step that you can skip). Normally, we can find any of our labels with a find option (by right-clicking on en-us in this case and choosing find). However, that isn’t the case here. Thankfully, we can still use the labels. If you needed to find the labels in search, I’ve included the instructions in parenthesis. Remember, not to do these steps unless you can’t find your label ID’s with search.
(Click on Build à Generate Incremental CIL to make sure that all of the changes have been taken. Note: normally, you don’t have to do this but old habits are hard to break. During non-peak time, you will need to start and stop the Dynamics AX Service. Click the Start à Administrative Tools à Server Manager option on the computer running the Dynamics AX service. Then, Expand Configuration and click Services. In the details pane, select Microsoft Dynamics AX Object Server 6.0$instancename and click Restart.)
-
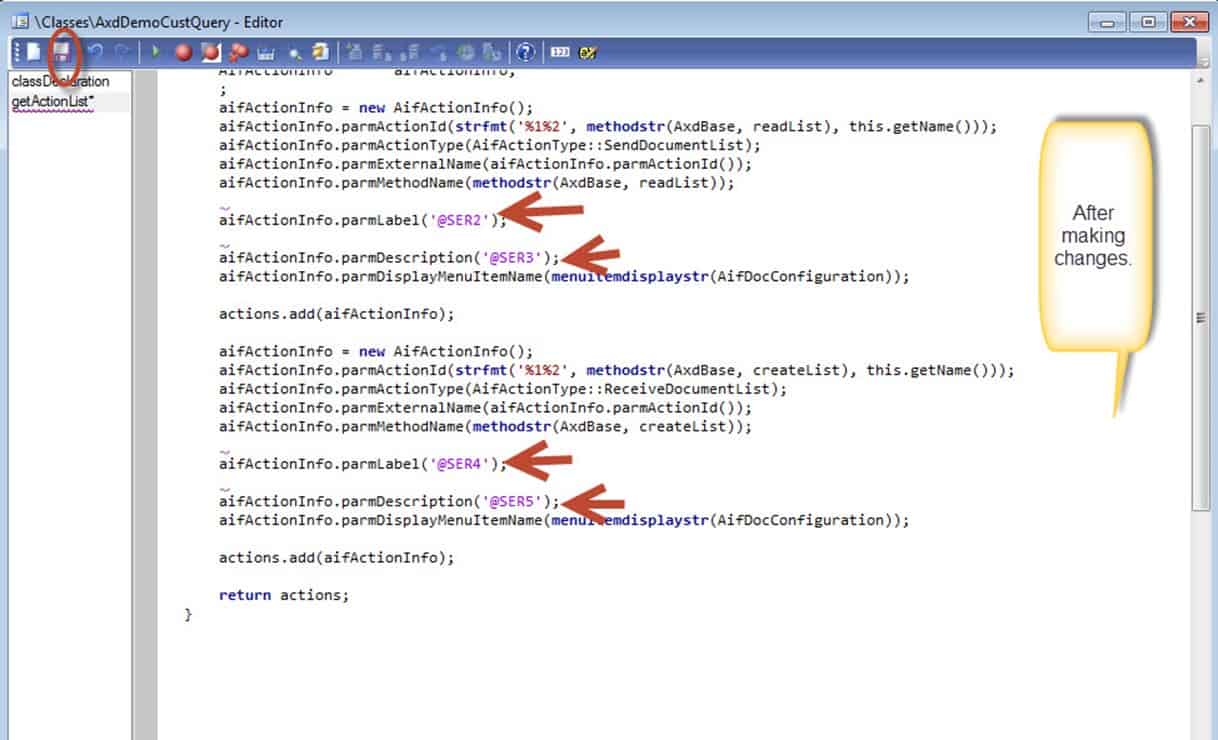
Now, with our file open, we will need to delete all of the ToDo’s like we did earlier and replace the hard-coded text with the LabelID corresponding with that operation. The following are the before and after pictures. Make sure that you click the save icon after you are all finished. Note, it is circled in the after screenshot.
-
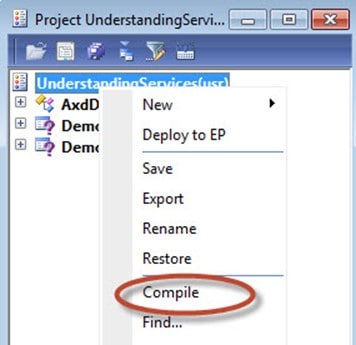
And that was the only code that needed to enter in the beginning! Just one word which translates to some text instead of you hard coding it. Okay, we have 3 more tasks to take care of and our service is ready. First, let’s make sure that we have a refreshed task list. Within your UnderstandingServices project, right-click on it and hit compile.
-
This will bring up your refreshed task window. Within the 2nd task, double click on the second task called with the method/property name column value of getLabel. We should get code up like in the second picture.
We need to create one more label here. Leaving the same name is just fined. It will give the entire set of data flowing a name that we can access in programmatic XML if we choose. Putting a label on it gives us to the ability to change the name depending on the locale quite easily.

-
Now, I want you to create a label in the same way that you did above (this is a good point to test yourself) called “DemoCustomerQuery” and with a description of “A name for xml people see”. (Hint: You do not need recreate the label file for this one as you already have on. Just simply right click on en-us under SER and click edit in Label editor. Remember to hit [ctrl] + [s] after you have entered the values. ) When you are done, should have an entry like this:

-
Go back to your getLabel method and make it look like the picture below. Then, hit save. Note that we have to use double quotes this time because we are returning a string.

-
Sometimes, you will have a case where a value within a column is dependent upon the value of some other table. Or, maybe, you want to change a default value in a column. In that case, you use the PrepareforSave à it allows you to make any changes right before the data can be saved to the database (in lay terms). Here we aren’t messing with it, but in a developer tutorial, I’d put a lot of effort into explaining this. It is extremely helpful. Double-click on the first task with prepareForSaveExtended in the Method/Property name.

-
Simply delete both of the ToDo comments and hit save.

-
Now, you’ve cleaned up the service. Okay, now it is time for a secret. Go back to your projects window, by clicking on View à Project


-
Expand the Private node and observe that by default, the MorphX environment creates a service for you with the same name as your Query (AxdDemoCustQuery). This little project has everything that you need to get your service up and working. Double-click on the project AxdDemoCustQuery to open it in its own window.

-
Right-click on AxdDemoCustQuery and click on Compile.

-
Notice that 1 or 2 items come up on the task list. Note: that I have 2 of them but my virtual machine crashed and I had to rebuild the lab. You may only see one. What this code does is write the xml that will be transmitted to some file location. It’s a good idea to talk with your network people about setting up a drive with fast write speed so you can write your files there. Normally, you would change the location by entering your own location, but I won’t mess with this. Simply delete the ToDo comments as have so many times in the past for this lesson. Then, save your changesas you have done in several steps during this tutorial. When you are all finished, right-click on the AxdDemoCustQuery(usr) project and hit Compile.

Congratulations!!! You now have the coding portion of a service finished. In this tutorial, you saw how to setup the wizard to generate a service. We aren’t finished yet, however. We need to actually host our service so that others can find it. We also need to put some security on it. We don’t just want anybody being able to create customers. We’ll do that in our next section.

