Consulting, Dynamics Operations Architecture, Featured Posts
Step by Step Performing a Code Upgrade from AX2012 to Dynamics 365 for Operations Part 1
 13736
13736 
Oct
The first step in learning to do an AX2012 to Dynamics 365 for Operations Code upgrade is to get acquainted with all the special tricks for downloading and running an environment. Due to overwhelming demand with emails, conversations, and requests, I’ve decided to publish a simplified version of the code upgrade course that I used for the AXUG. Give me some time to get this finished. I am actively doing an AX 2012 code upgrade to D365 for Operations and Finance. I was quite surprised at the excitement and demand around this subject. I mean, the implementations are usually happy but I didn’t expect for there to be so many passionate upgraders up there. At present, I don’t have the time in my schedule to write a full-blown blog post, but I believe that I can make a couple of posts in a series, which should be able to save somebody out there a whole lot of time. Enjoy..
Prerequisites: you read part one of this post and get yourself a lifecycle services project setup and provisioned if you don’t have one. This doesn’t cost anything, just your time to fill out the forms if you are a customer, partner, or an independent learner. Second, make sure that you create a Visual Studio Team Services Project. I walk through how to do this in my On Premise install Tutorials Part 1 in case you are rusty. (http://instructorbrandon.com/tutorial-setting-up-your-dynamics-365-operations-and-finance-dynamics-ax7-on-premises-environment-part-1/) Third, you export a compiled and working model store out of an environment with AX2012 and run it through the code upgrade tool. Don’t check the analysis only option. Instead, let it run through and create a full-blown Code Upgrade project for you. Once you get to that point, that is where this tutorial comes in. There are plenty of tutorials that show you how to click the blue button “Code Upgrade” by the way if you are confused on how to run the tool.
First, simply download the latest platform update or the platform update that matches your version of Dynamics 365 that you will use:
In order to do this, you must be a customer or fill out the forms and make the requests with Microsoft to get lifecycle services. If you are a customer without a Dynamics Operations and Finance Project, you will simply send a request to DA***@*******ft.com with your CustomerSource organization ID from the email of the person who is the global administrator. They will then send you back a link that you can use to access the machines.
If you are someone who wants to learn you have to first create an organization on partnersource than send an email to MBS Agree, who will get you provisioned as a non-selling partner. Then, you send an email to DA***@*******ft.com.
If you are a partner for Dynamics, simply send an email to DA***@*******ft.com.
From there, login to lifecycle services with a Microsoft Office tied in email address, for example, I used brandonahmadlabs.com for my study environments, which is just an environment that I made myself. I setup up a server and use ADFS to authenticate it.
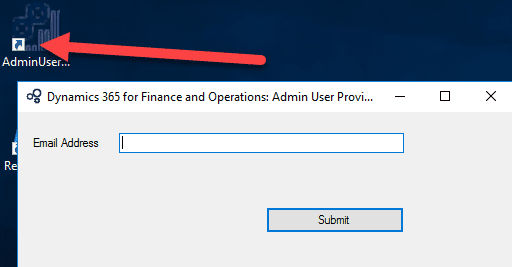
Second, login to the VM and run the Admin Provisioning tool with your Office 365 linked Email Address
I personally have gotten to the point where I disable UAC on all my development servers first because I’m tired of the unexpected problems that it has with just about everything D365. Google how to disable UAC in the registry if you need to look this up. But afterwards, I run the Admin Provisioning tool and put in my email address.
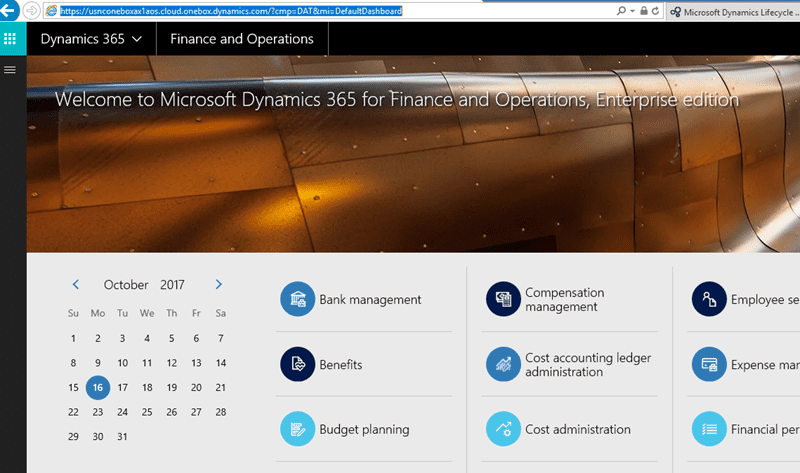
Third, Open Up Internet Explorer and browse to the test URL to make sure that things are working.
You will see the URL in the history but I also include it in the screenshot. Basically, it’s the generic Contoso VM. This VM doesn’t do everything but it’s just fine for an initial code upgrade before the testing phase. It takes a little more configuration (and undocumented tips for me to blog about another day) to get it working fully with a local on-premise environment. However, you can do what you need for doing an upgrade and developing forms and a few other things.
https://usnconeboxax1aos.cloud.onebox.dynamics.com/?cmp=DAT&mi=DefaultDashboard
If you are a developer wishing to learn more then it may be wise to check out our Boot Camp, which takes you from zero to hero with some serious hands-on lab action.
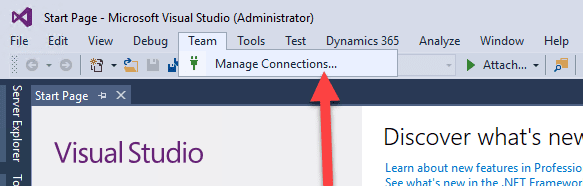
Fourth, after you open up Visual Studio as an Administrator, connect it to Team Foundation Server Online
You can get a VSTS account for free though you should have one through your MSDN subscription.
Open up the menu and connect through Visual Studio.
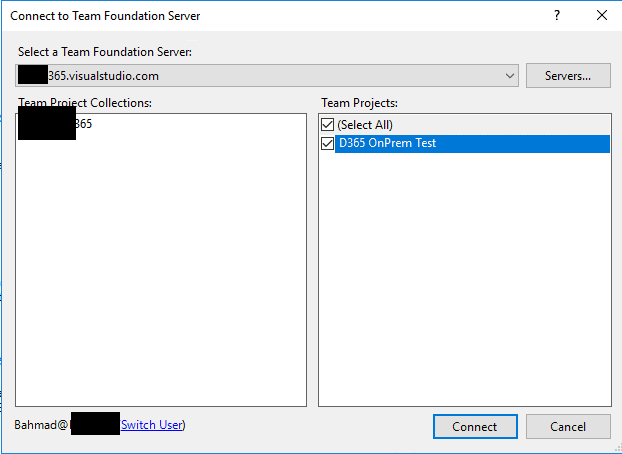
Then, add the visual studio data and click on connect.
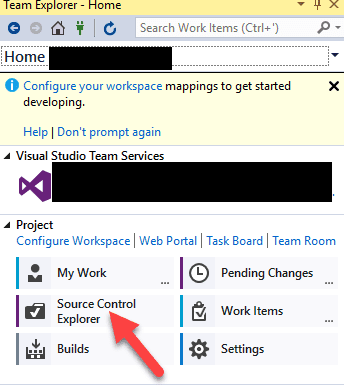
Fifth do the 3 Part Special Configuration necessary to get things setup for Source Control
So, if you are going to setup a local onpremise VM with source control, you have to do your regular steps like the cloud plus extra. Let’s go through it.
Go to Source Control Explorer:
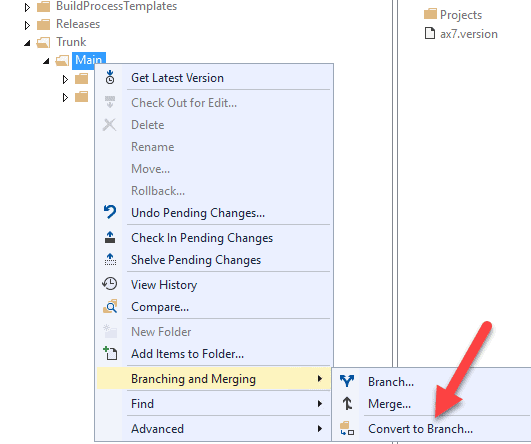
Sixth, Highly Consider branching if you are working on a team
In Source Control Explorer, right click on trunk and choose Convert to Branch. You will do this initially.
You can choose whatever naming scheme you like but here is the idea. We basically get that branching is where we create independent copies of code that we can work on and then merge back later. It allows us to maintain multiple streams of development. Even though this can be controlled with policies, perhaps you don’t want other developers overwriting themselves for an upgrade. Also, on a really big upgrade, you may want to get some help and partition out the work. In that case, a lot of places have gone to one branch per a developer. It just depends on what you need. The other advantage to branching is that you may have existing development already going. If you don’t want your upgrade efforts to mess with it, you create a separate branch. Throw in the recent surge of platform updates where two binary versions of the product are completely incompatible with one another and branching becomes a must for Dynamics 365 Code Development. This is why in Dynamics 365 for Operations Code Strategy, branching is used so much more heavily than it was in AX2012.
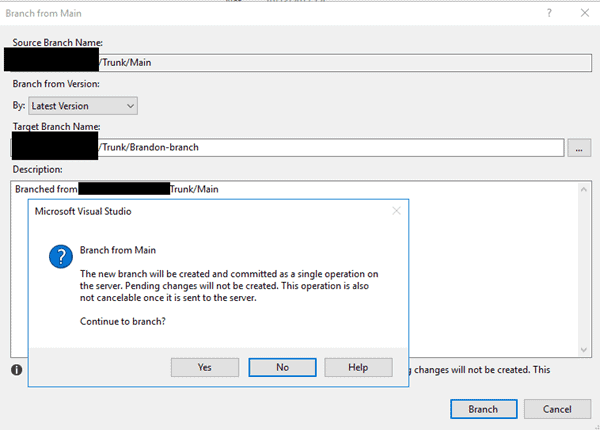
Notice here I branched the trunk main for later merging by creating a trunk called “Brandon-branch”. I wouldn’t have given it my name in most scenarios.
Seventh, Configure the Workspace Mappings
Yes, I realize that you could have clicked on configure workspace when I showed you the Team Explorer Panel but let me show you another way..
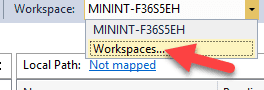
At the top of the tab, see where it says Workspace. Click the drop down and click on where it says “Workspaces”
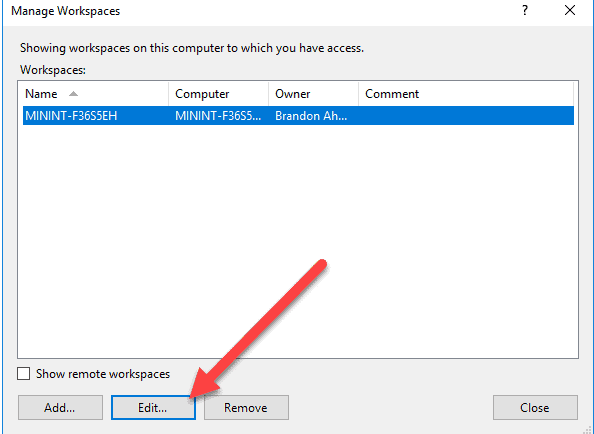
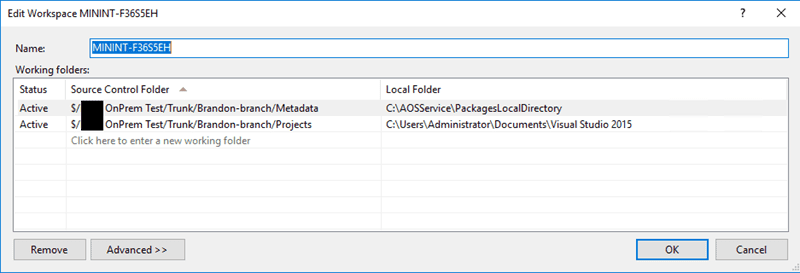
Click edit on MININT-F36S5EH
Now, you need to immediately map two different folders. Notice how I come from the branch. This part will almost follow the documentation but it uses branching as we would do in a real enterprise scenario, and adds a little trick you need to do in order to make the on-premise version work. So keep reading.
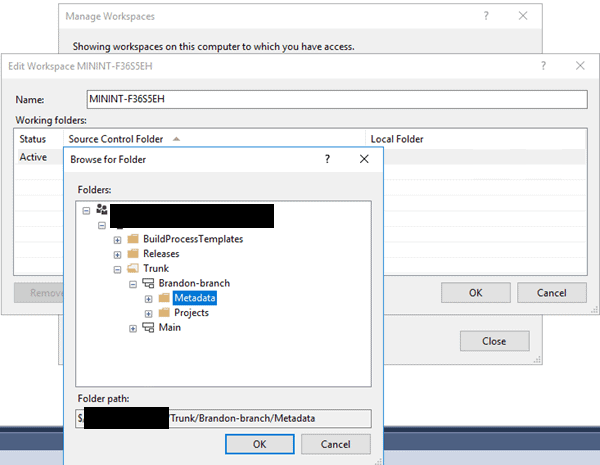
This is what you should be looking like at the end.
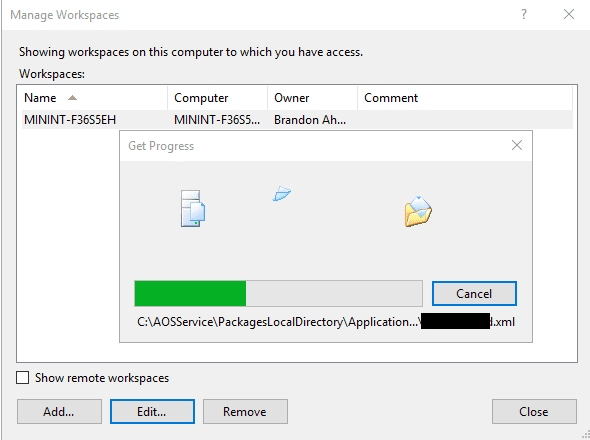
Now, watch in awe as it downloads all of your AX 2012 upgraded code to source control. It will ask you a little confirmation to do a first time update and be sure to click “OK” when it does and you will see all of your code download.
Eighth, go through the manual horrible process of mapping the XPP Metadata into each and every folder
So, for some reason the XPPMetadata folder doesn’t get mapped into your source control. To get around that, you have to browse to ever folder underneath the Metadata for your branch and add it in. It really sucks and takes a lot of time.
Here is how you do it.
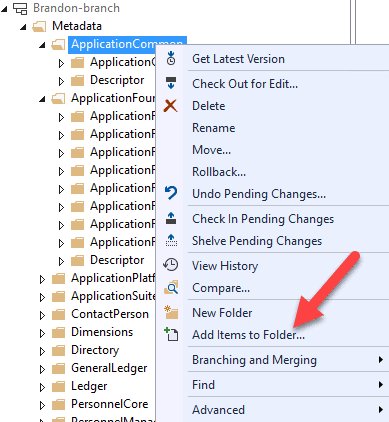
What you will notice is that in the metadata file a unique folder is created for every Dynamics 365 model that that was impacted by the merge along with the ax2012 model that effected it — something like ApplicationSuite..CusModel. Notice how I start with ApplicationCommon. and choose Add Items to Folder.
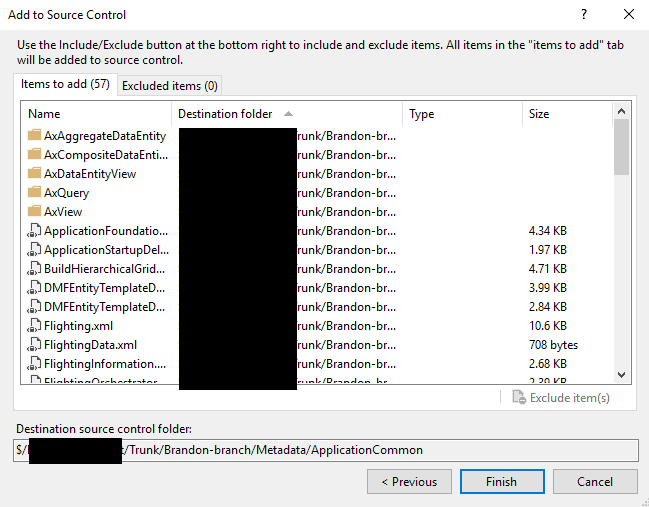
Next, browse to your XppMetadata folder. If you don’t see it, then you need to attempt to run a compile which will usually create it. Then, click finish on the Add to Source Control Screen. It will create a bunch of pending changes.
You can check it in now but don’t do so just yet. Confirm that it worked by seeing if you have the XPPMetadata folder checkedin at this point.
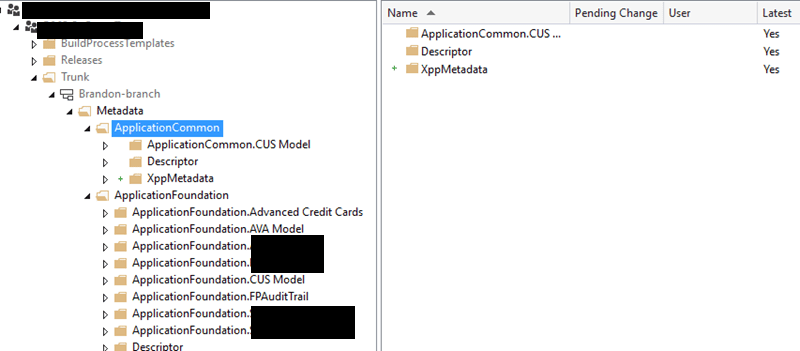
Great, now repeat the same process for every single folder that is listed immediately underneath the metadata folder. So, for example, you need to add an XPPMetadata folder for the ApplicationCommon folder but not the “ApplicationCommon.Cus Model” that is nested underneath it. And you need to add one for ApplicationFoundation but not all the children below it.
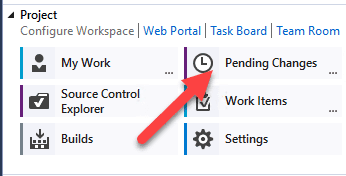
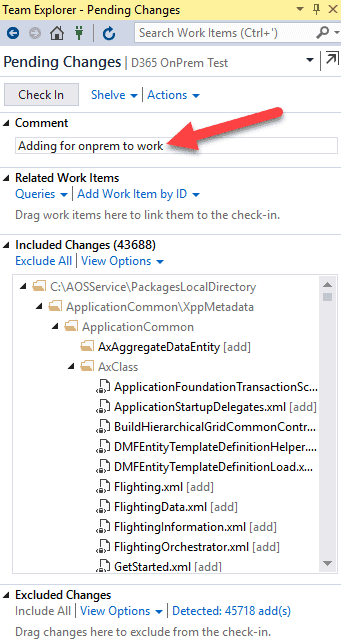
After going through every one of those folders, now go to team Explorer à Pending Changes à and check in the changes.
Next, check in changes here. Notice that in this case, there are 45,718 changes but it’s my own branch so I’m not interfering with any other developers.
Okay that fixes the first gotcha for onpremise vm’s where they don’t know where to look for the XPPMetadata file. On the cloud vm’s, you don’t have to do this at this time. The projects are created with the right pointers internally for the XML file. Also, of note, I’ve been intending to try just checking in the XPPMetadata file while excluding any files and seeing if that works for being able to open up projects. In other words, if I just put empty folders in TFS but left all the components in the folders would that work. Perhaps it would especially since the onpremise version doesn’t require this folder, but that is an experiment for another day. This way works.
Ninth, the Lifecycle Services code Upgrade Tool got broken by the recent platform update and now creates circular references for 2012R3 customers. So, let’s fix it.
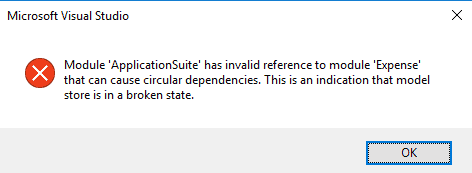
Uh oh.. a Microsoft update broke the LifeCycle Services Code Upgrade tool. I actually tested this one against a vanilla modelstore just to see if it still existed apart from my client and it did.
Urghhhhhh!!!! the dreaded invalid reference to module that can cause circular dependencies issues! This is the new “model id conflict” type of pest that plagues implementations and code moves in the new D365. Every version of Dynamics AX/Operations has one of these.
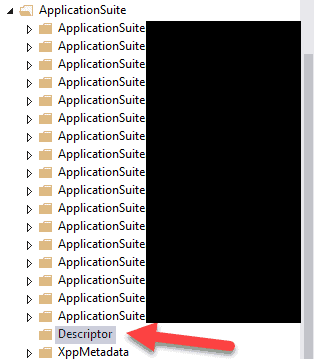
So, go to the Descriptor folder for the module that is acting up.
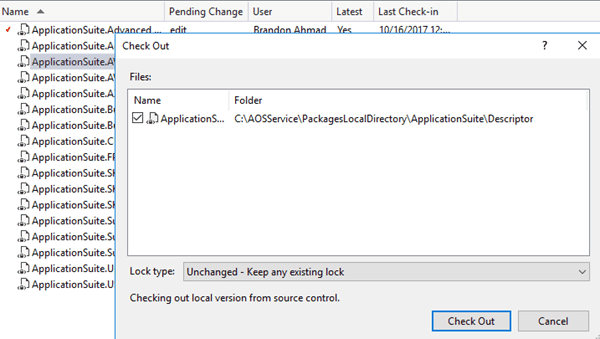
Now, check out each file in the folder for the module that it is complaining about in this case, ApplicationSuite.
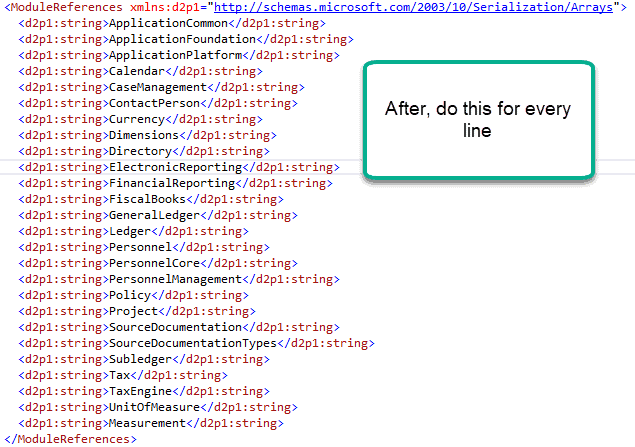
Right click each folder and choose “view” in visual studio to open it. Then painfully go through each one and delete the expense line in this case
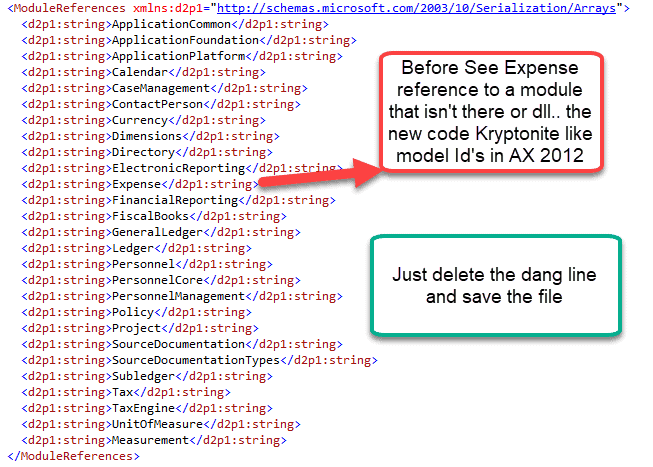
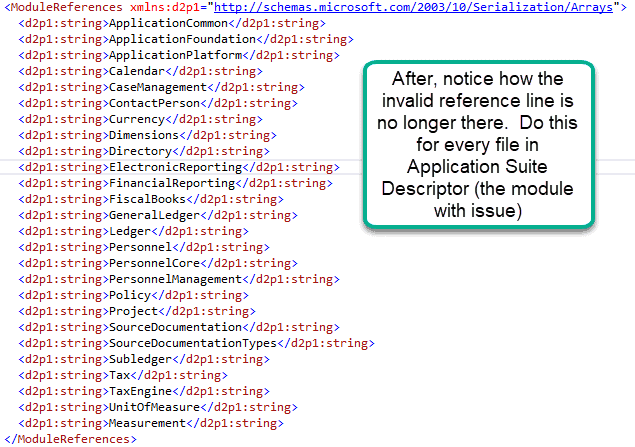
And now delete the line. Do this for every line.
And Afterwards… making sure that you hit the visual studio save button.
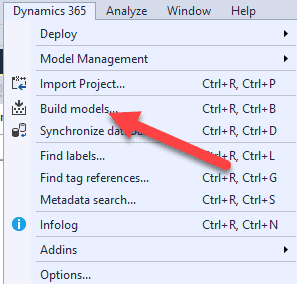
Now, close visual studio and reopen it. Got to the build menu. Build the model that acted up – in this case the application suite. Make sure that you choose to also rebuild all referenced models.
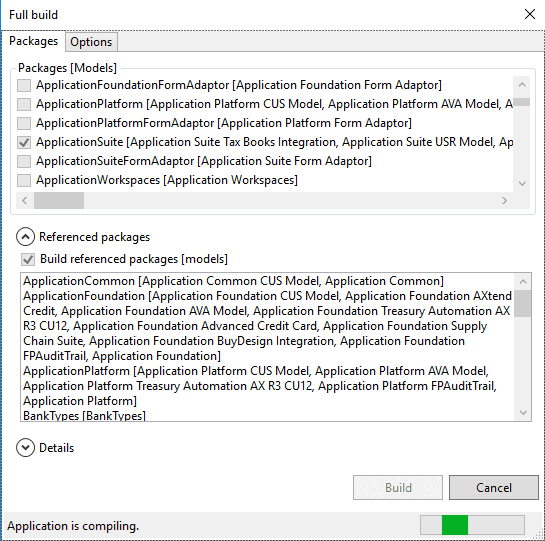
If all builds fine, except for the pending errors that are waiting for you on the next post in this series than you are good. In other words, if you don’t get the circular error anymore. Congrats, now you are setup to begin upgrading your system from 2012 or another hotfix.
In Summary, we learned how to take a Dynamics Operations VM and provision it to a local environment that we downloaded for upgrading our code. Along the way, we got to do a full walkthrough where we went from project creation to provisioning a branch to resolving wacky Microsoft code errors. It should be a lot of fun and end up saving those who read it a lot of time. In the next post, the fun begins and we start the process of upgrading. Hold on to your horses because Part 2 is coming.


Superb Post (Y)
Just wondering why we are adding XPPMetadata folders in TFS? As these XPPMetadata files will automatically be created on any machine when we will get latest on that machine from TFS and build the models. I never add XPPMetadata files in TFS.
Very good points Shahrukh. What previously happened in the on-premise version is that the default upgrade projects wouldn’t load if you didn’t at least map the XPPMetadata folder into TFS. It was strange and quirky. I hated doing it. I’m hoping that Microsoft has fixed this issue now. When I wrote the post, this was valid behavior on the latest platform update (11 at the time).
Hi Sir ,Thanks for sharing such an amazing article.
Thank you very much. My pleasure!