Consulting, Microsoft Dynamics AX
Dynamics AX Reporting Part 2C: Advanced Tutorial, getting that purchase order to look the way you want it to look
 12662
12662 
May
In part 2C, we finally get the payoff for all of our efforts. Truth be told, every one of the PO confirmation reports I write is different. That is because it depends on the individual company and what they want their vendors to see. Use this tutorial to get ideas and then consult with your Procurement people to see how to create something that works for your company. Here, we will take the standard PO confirmation and transform it into something that actually looks professional when we send it to vendors. See, there are two areas where our reports must be clear while giving a good impression of our clients – when we buy something from someone (vendor aka PO Confirmation) and when someone buys something from us (customer aka Account Statement). The PO Confirmation is an informal contract saying that we agree to buy these items at this price from someone at a specified price and we need to treat it with the care that it deserves when we develop it.
Disclaimer: this is an advanced tutorial based upon real-life work and not just demo-ware( Please see previous two posts in this series)
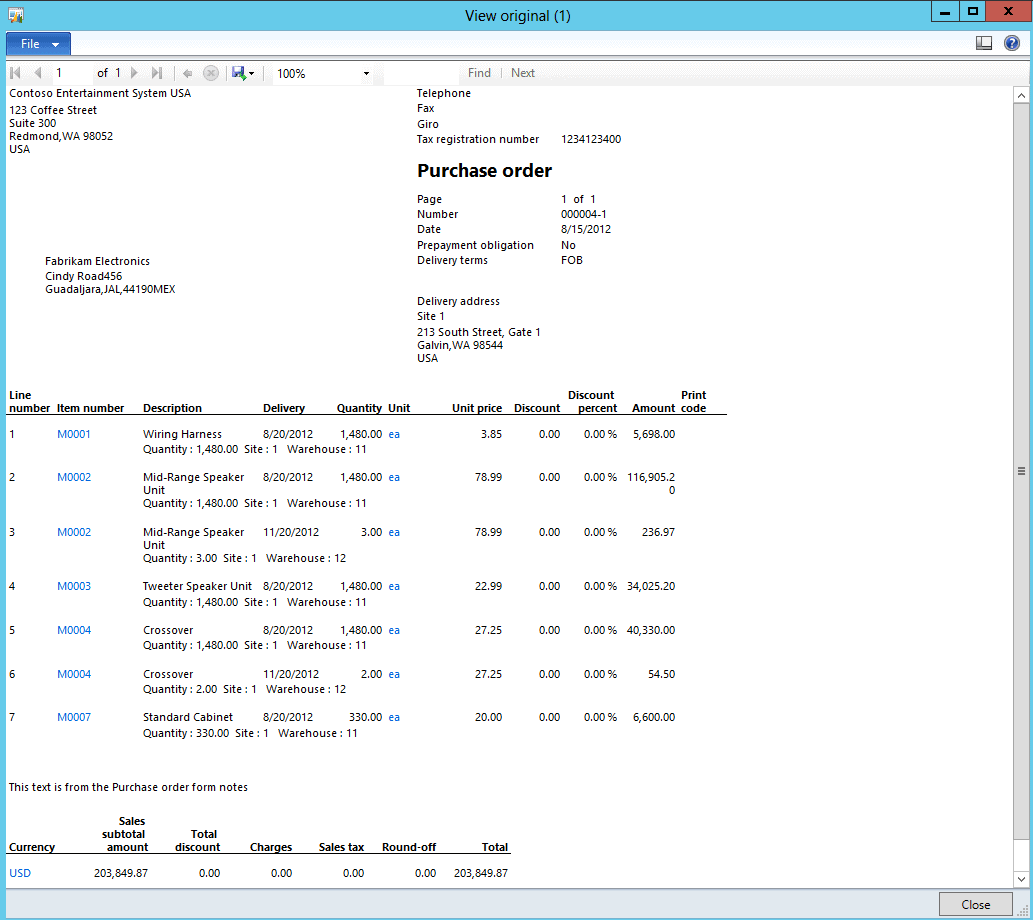
So, let’s start with the existing report. Make sure that you bring the PO report into a Microsoft Dynamics AX Model Project that you create. The original report will look something like this.
Looks like we got a lot of work to do. Okay, let’s get started. This is the original report – unaltered and out of the box.
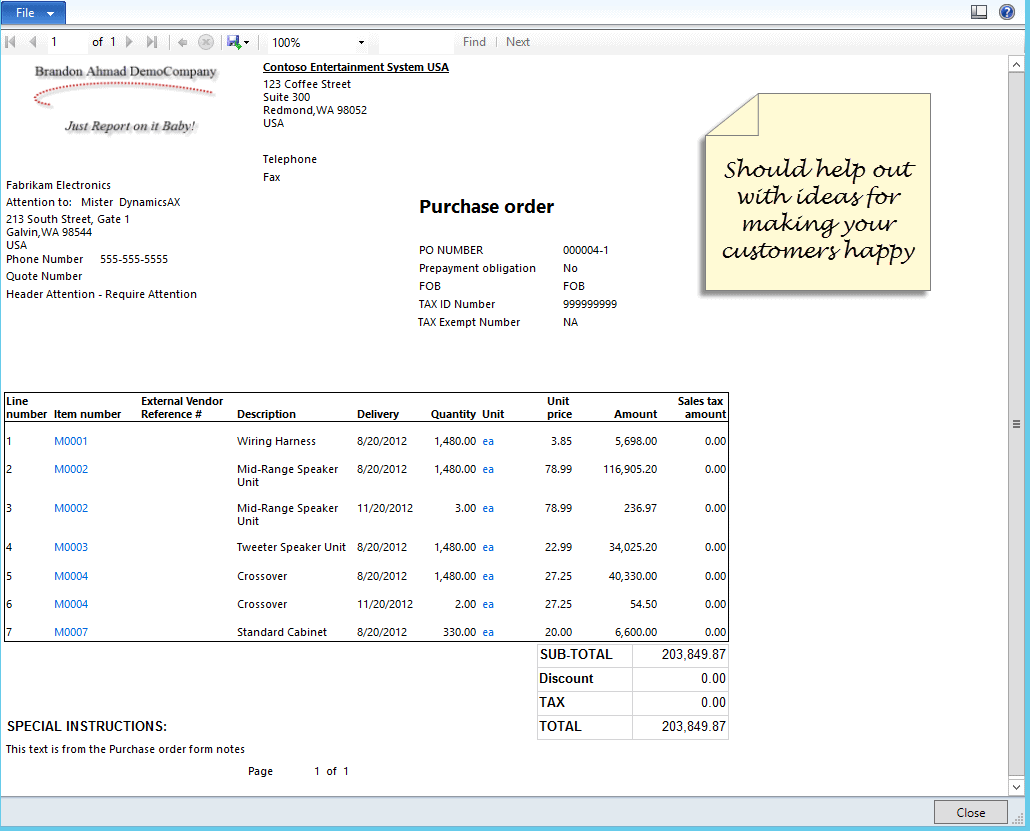
Let’s go ahead and change that. Now, first, look at all the changes that I made to the report. Let’s go through them:
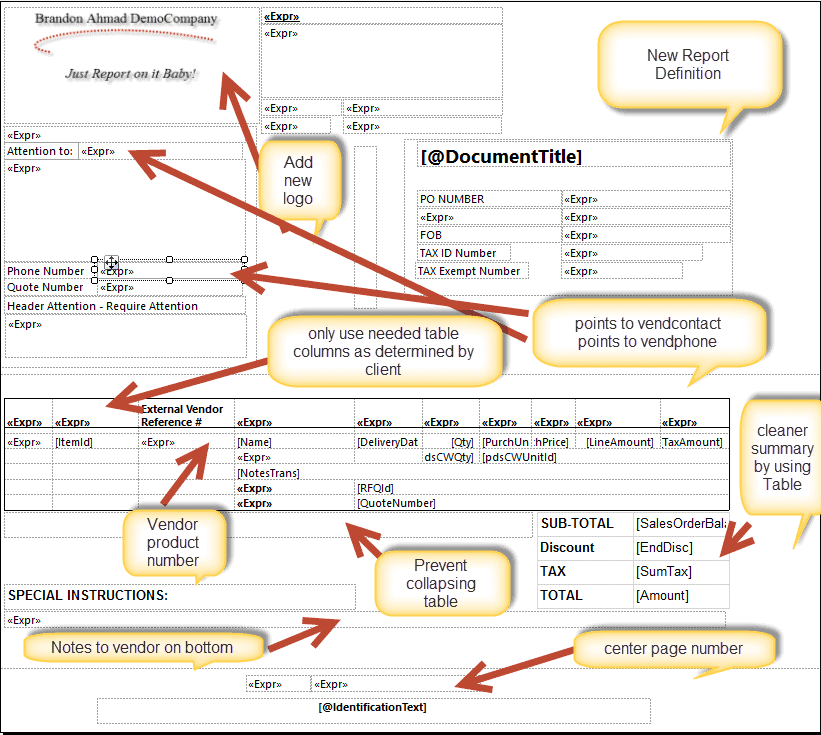
- On the left, notice that I changed the logo for humor’s sake. What is important is that logos go on the top left and identify your company for branding purposes.
- I moved the existing text boxes around, deleting the things that didn’t apply to my client’s situation as per my client’s instructions. This is important: An AX out of the box report is made to be customized. It will often include several fields that won’t apply to your client’s implementation. It depends on what each company needs.
- Notice that on table, I included a new column called External Vendor Reference #. This is also known as the External Item Number in the Released Products form. Use this if your vendor has a name that is different than your internal item number but you still want the report to print out the vendor numbers.
- I centered the page numbers on the bottom rather than include them on the top
- I added a TAX ID Number for the company and Tax Exempt number per a last second request by my client. Clients with lots of subsidiaries often like this.
- Notice how I was able to keep the group of subtotal Tables from going to the left of the page by using a Textbox
- AX does not always render textboxes correctly. More particularly, some things will not render unless there is at least 2pt of space between them , hence the TaxID Number and Tax Exempt Number.
Study this definition or the Purchpurchorder Report and use it to get ideas on how to meet your client needs. And what was our final result of all this.. We have a PO report that meets this anonymous client’s needs. ..