Data Model Series, Dynamics 365 Tutorials
Techno-functional Dynamics 365 F&S Data Model Explanations for Reporting, Part 11 of 25 - How to Create a Customer Account
 27439
27439 
Aug
Things have changed a lot since I started blogging over a decade ago. There are so many wonderful topics to blog and learn on today; it seems like one doesn’t even know where to start. To make the process more friendly, I’ve introduced a new sort of blog series with data model functionality, amazing ERD, and tables. Some very talented developers from my team have contributed their expertise to assist with this content approach to ensure that we keep our quality and quantity high. I hope you all sincerely enjoy the new approaches that we’ve innovated.. And as always, don’t hesitate to reach out to me.. I’m always here to help. — Brandon Ahmad
Customer Creation in Dynamics 365 F&S
This blog post helps you experience hands-on learning of one of the most frequently used processes in the application—Customer Creation. With our easy-to-learn techno-functional walk-through, you will develop a better understanding. Learning how to perform this process is extremely important, as all organizations which sell products and services have to deal with it.
With the Data Model Functionality, ERD and tables included in this blog post, you can grasp onto the right ‘Customer Creation Process’. Practicing the technique will help you master it, making it easier to create a customer in ‘Account Receivable’ and ‘Sales and Marketing Modules’ in Dynamics 365 F&O.
Now, let’s move on to creating a customer.

Customer Creation: Dynamics 365 F&S Functional Walkthrough

Step 1
Navigate to ‘All Customers’ by clicking on ‘Modules’ > ‘Accounts receivable’ > ‘Customers > ‘All Customers.’

Step 2
After that, click on the ‘+New’ tab at the top left corner. This will direct you to ‘Create Customer.’
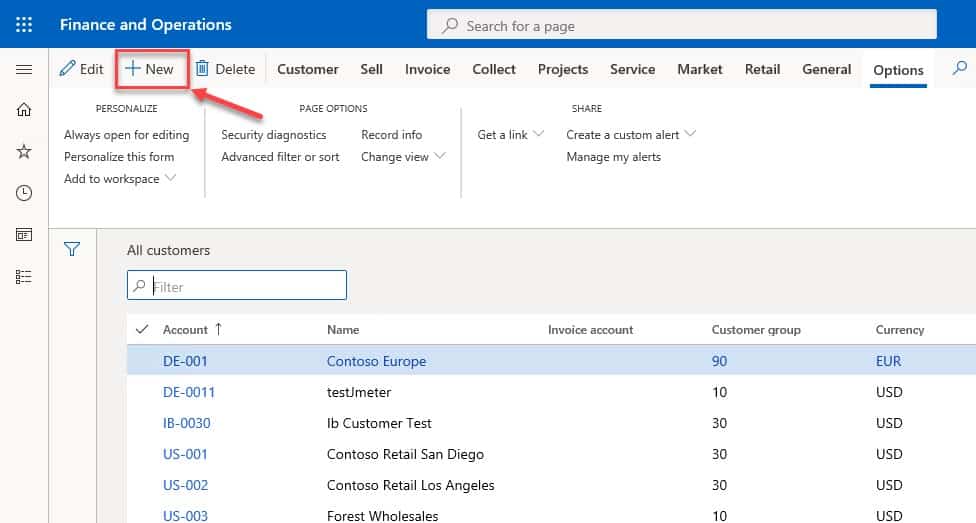
A dialog opens on a list page where we can enter basic information. Customer type can be an Organization or Person. Customer Name, address and even contacts are global across the application.

Step 3
Clicking ‘Save’ button will create customer and will open customer form. The other button ‘Save and open’ will give the following multiple options along with customer creation.
Sales Quotations: Here you can create Sales Quotations and enter its details to send it to the customer.
Project Order: It will open the Project Quotation form once the customer is saved.
Sales Order: You can create Sales Order here against newly created customer.
Step 4
After clicking ‘Save’ button, you will see a customer detail form where you can add further details to the customer. In the image below, you can see the tabs for these details:


Step 5
In the Address fast tab, you can add Customer address. And in the Contact fast tab, you can add Contact information.


Step 6
‘Payment defaults’ fast tab contains the payment options for customer. Follow are the fields you have to enter in this step.
- Terms of payment
- Method of Payment
- Payment specification
- Payment schedule
- Cash discount
- Payment day
- Payment terms base days
- Bank account
- Bank account number
- Use cash discount

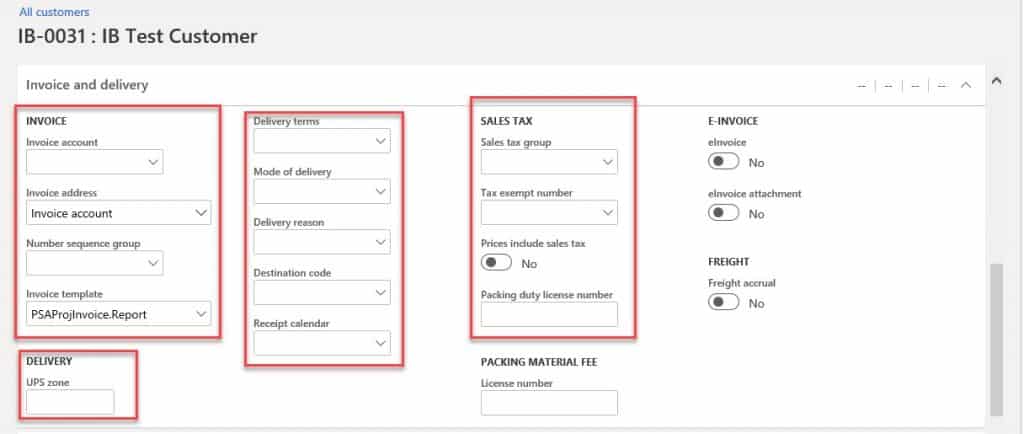
Step 7
Sometimes it is necessary to send an invoice to a customer who is not the order customer. In such a case, go to ‘Invoice and delivery’ fast tab and select customer account for invoicing in ‘Invoice account’ field.
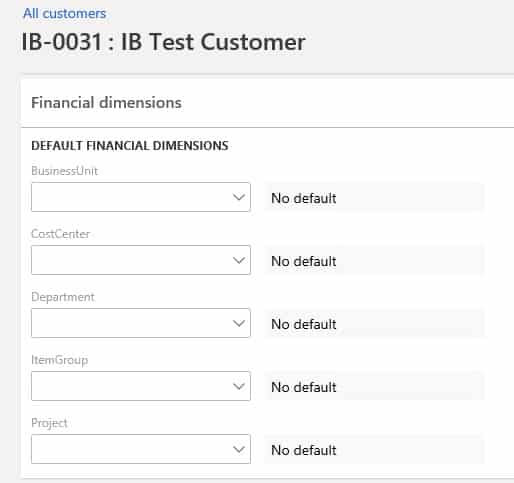
Step 8
We can set financial dimensions in the ‘Financial dimensions’ fast tab. Once we set them to the customer account level, sales order will automatically get copies of financial dimensions.
Step 9
To group customers for pricing purposes, go to ‘Sales order defaults’ tab in the customer form. It contains the price group and the discount groups (line discount, multiline discount). And in this fast tab, you can also set preferred shipment from warehouse and site to customer.

Step 10
Following are the options we have in ‘Warehouse’ fast tab:
ASN: Advance shipment notification
Fulfillment policy: Threshold before releasing to Warehouse
Default inventory status ID: Status for inventory transaction

Now, we will move on to the technical part of creating a customer.
The Data Model Behind the Customer Creation: Dynamics 365 F&S Technical Walkthrough
In this part, let’s learn the technical part involved behind customer creation process in Dynamics 365 F&S.
Entity Relationship Diagram: D365 Customer Creation
The following diagram is an Entity Relationship Diagram (ERD) that illustrates the relationships between tables and logical structures of related tables. Here it shows the principal tables involved in the customer creation process in Dynamics 366 F&S.

Below you will see a Runnable Class (job) to create customer in D365 F&S.
[sourcecode language=”c-sharp”] class IBCreateCustomer{
/// <summary>
/// Runnable job to create a customer using the V3 standard entity
/// </summary>
public static void main(Args _args)
{
CustCustomerV3Entity customer;
CustAccount customerAccount;
customer.clear();
customer.CustomerAccount = "IB_001";
customer.PartyType = "Organization";
customer.OrganizationName = "Instructor Brandon Customer";
customer.CustomerGroupId = "80";
customer.SalesCurrencyCode = "USD";
customer.PaymentTerms = "Net10";
customer.PaymentMethod = "CHECK";
customer.AddressCity = "Texas";
customer.AddressStreet = "123 Street";
customer.AddressStreetNumber = "123";
customer.AddressCountryRegionId = "USA";
customer.AddressState = "TX";
customer.PrimaryContactPhone = "012-345-6789";
customer.PrimaryContactEmail = "cu******@**.com";
customer.insert();
info(strFmt("Customer ‘%1’ created successfully", customer.CustomerAccount));
customerAccount = customer.CustomerAccount;
// Select the customer from the entity and display it on infolog:
select forupdate customer where customer.CustomerAccount == customerAccount;
info(strFmt("Customer ‘%1’, %2 selected from database", customer.CustomerAccount, customer.OrganizationName));
// Delete the customer from the entity:
customer.delete();
info(strFmt("Customer ‘%1’ successfully deleted from database", customerAccount));
}
}
[/sourcecode]
There are many tables involved in this process, but we’re going to focus on the two major tables: ‘CustTable and ‘CustTrans.’
Let’s go ahead and start with CustTable.
CustTable
CustTable contains the customers for account receivable and Sales & Marketing in Dynamics 365. This table stores the header information of the Customer. The CustTable also:
- sets up payment method other than cash such as Cheque, Credit card, Postdated Cheque etc.
- has Invoice account that is used when invoice needs to send to the customer who is not the order customer.
Below, we have listed down other significant fields of the CustTable along with their respective descriptions.
| Field | Data Type | Description |
| AccountNum | string | Customer account number |
| CustGroup | string | Customer group |
| BankAccount | string | Bank account for customer |
| InvoiceAccount | string | Invoice account on which invoice will be posted |
| InventSiteId | string | Site for sales order |
| InventLocation | string | Warehouse for sales order |
CustTrans
The CustTrans table contains the posted transaction information of the customers. We can also get all the information added in the posted transaction information of customers through this table. This table also contains the Invoiced customer transactions information which is very useful for reporting. Below you will see some of the important fields of this table along with the descriptions.
| Field | Data Type | Description |
| AccountNum | string | Account number. |
| TransDate | date | Transaction date for customer transaction |
| TransType | Enum | Transaction type |
| Invoice | string | Invoice id |
| Voucher | string | Voucher for invoice |
DirPartyTable
This table works as a global table in D365, and it stores any party record (e.g. vendor or customer) with contact information and address information. In the table below, you will find a few important fields of this table.
| Fields | Data Type | Description |
| Name | string | Party (customer, vendor) name |
| PartyNumber | string | Unique party record number |
| PrimeryAddressLocation | Int64 | Relevant recid of LogisticsLocation table for reference |
| PrimeryContactPhone | Int64 | Relevant recid of LogisticsElectronicsAddress |
| RecId | Int64 | Record id |
LogisticsPostalAddress
This table stores information about the address created in D365. It has multiple relations with another table – DirPartyTable. By using these relations, we can get the required information about addresses from this table. Some of the important fields of this table are mentioned below.
| Fields | Data Type | Description |
| Location | Int64 | Relevant RecId of LogisticsAddress table |
| Address | string | Address value |
| Street | string | Street number of address |
| State | string | State name of address |
LogisticsElectronicAddress
In this table system stores contact information including Phone number, Email id, social media accounts and Fax numbers. This table is directly connected to DirPartyTable to store all the contact details. Let’s have a look at the few important fields of this table.
| Fields | Data Type | Description |
| Location | Int64 | Relevant RecId of LogisticsAddress table |
| Locator | string | Contact details such as customer’s email id, phone, twitter account, etc |
| Type | enum | Type of contact such as email, phone, twitter, facebook or Fax |
| RecId | Int64 | Record id |
Overview
In this post, you have:
- learned to perform one of the most frequently used processes in Dynamics 365 F&S—creating a customer
- looked at the technical side of the customer creation process
- familiarized yourself with ERD, tables, and the X++ code
- understood the importance of the two major tables: CustTable& CustTrans, along with their functions & fields.
We sincerely hope that you enjoyed part 11 of our exciting series on the Dynamics 365 data model. We aim to provide quality service at all times. And as always, if you need to reach me, you know how to get in touch by reaching out to me here. — Brandon Ahmad, founder of InstructorBrandon and Dynatuners

